Hollow-point is the best round in WARDOGS for about five minutes. Against an unarmoured target in the beta it read 61 damage where standard ammunition read 28 — better than double, and exactly the sort of thing that makes you buy a box of it. Against the cheapest plate in the shop, a $400 Level 1 vest, the same round read 9.
That is the shape of the whole game. WARDOGS looks like a shooter with a shop bolted on, and then about four hours in you work out that the shop is the game and the shooting is how you pay for it. This guide is the layer underneath: ten mechanics that are never explained, each with the figure attached, in the order they will cost you money.
Buy FMJ by default, and hollow-point only for the first five minutes
Every calibre is sold in three types and they are a filter across the shop rather than a property of a gun: the same 5.56 rifle will take Standard (FMJ), Flesh Damage (HP) or Armor Piercing (AP). The card text tells you the shape of it — HP is "increased damage against flesh, decreased damage against armored targets" — but not how much, and how much is the entire decision.
Here is what one rifle read on the practice range in the beta, against a bare target and then against Level 1 and Level 2 armour. The unarmoured FMJ figure lines up with 5.56, whose standard round carries 28 damage, which is a useful sanity check on the rest of the column.
| Target | FMJ | HP | AP |
|---|---|---|---|
| No armour | 28 | 61 | 24 |
| Level 1 armour | 21 | 9 | 18 |
| Level 2 armour | 18.5 | 6 | ~18.7 |
Three things fall out of that table and all three are worth money.
HP does not degrade against armour, it falls off a cliff. Not a tapering penalty — 61 to 9 the moment the target owns the cheapest vest in the game. You are not carrying a specialist round at that point, you are carrying a downgrade you paid extra for. It is a round for the first contact of a match, for hunting people who are still saving, and for nothing else.
AP is worse than FMJ until the armour gets expensive. This is the counter-intuitive one. AP starts lower on flesh — 24 against FMJ's 28 — and against Level 1 it lands in the same place FMJ does, just from a worse starting point. Its trick only shows at the top: FMJ keeps sliding as the plates thicken while AP barely moves, 18 to about 18.7 from Level 1 to Level 2. Against Level 3 and Level 4 armour, and against vehicles, that flat line is the point.
You will probably never own AP anyway. Bulkhead's Season 1 changelog puts the 5.56 AP unlock at Wardog level 83 and 7.62x54 at 82, and the studio's own estimate is that a median player is around level 20 after 20 to 25 hours. AP is a late-account round. Plan your first hundred hours around FMJ and treat HP as a situational box you buy occasionally.
The exact multipliers behind that table have never been published, and one round fired at one plate is not a curve — our own TTK chart still runs on standard ammunition for that reason. The ordering is the safe part, and the ordering is what you act on. The full calibre list, with base damage per round, is in the ammunition catalogue.
Armour is a percentage, and here is the percentage
Armour in WARDOGS is not a second health bar. It is a flat reduction on damage to the parts it covers, plus a durability pool that wears out, and both climb with the tier.
| Tier | Item | Damage reduction | Durability | Covers | Price |
|---|---|---|---|---|---|
| 1 | Light Armor | 30% | 200 | upper, middle and lower torso | $400 |
| 2 | Medium Armor | 40% | 220 | upper, middle and lower torso | $1,000 |
| 3 | Heavy Armor | 55% | 250 | upper, middle and lower torso | $2,000 |
| 4 | Super Heavy Armor | 65% | 300 | torso, pelvis and upper arms | $4,000 |
Level 4 is the only tier that covers anything beyond the torso, and that is the argument for it rather than the extra ten per cent. Everything below it leaves your pelvis and arms bare no matter what you paid. No tier covers the legs at all, which is why experienced players shoot low at anyone in heavy armour: against a Level 4 chest you are throwing away 65 per cent of every round, and against the same player's thigh you are throwing away none of it.
Helmets run the same four reduction figures at lower durability, and they have their own coverage step:
| Tier | Item | Damage reduction | Durability | Covers | Price |
|---|---|---|---|---|---|
| 1 | Light Helmet | 30% | 80 | head | $200 |
| 2 | Medium Helmet | 40% | 100 | head | $500 |
| 3 | Heavy Helmet | 55% | 180 | head and neck | $1,500 |
| 4 | Super Heavy Helmet | 65% | 200 | head and neck | $3,000 |
A helmet covers your entire head, which is worth saying out loud if you are coming from Escape from Tarkov, where a face shield is a separate purchase and an exposed jaw is how most of your raids end. There is no such gap here. The whole head is protected until the helmet breaks, and against a lot of weapons even a Level 2 helmet is the difference between a sniper hit and a sniper kill.
Buy a tac vest for the hotkeys, not the storage
This one catches everyone arriving from an inventory game. A tac vest does not increase how much you can carry. What it does is open up usable hotkey slots — the beta ran roughly slots four to six on a Small, seven and eight on a Medium, nine and ten on a Large — and speed up reloads and weapon and equipment swaps.
| Item | Price | Unlock |
|---|---|---|
| Small Tac Vest | $100 | none |
| Medium Tac Vest | $250 | Wardog 14, $10,000 |
| Large Tac Vest | $400 | Wardog 50, $25,000 |
At $100 with no gate, the Small is close to a mandatory purchase on every kit: three extra bound slots and faster hands for less than a quarter of the cheapest plate. Carrying capacity is the backpack slot's job, and that ladder runs from a free Pouch through the $350 Scout all the way to a $15,000 Halftrack. They are separate spends out of the same wallet, which is the thing to get straight before you buy the wrong one.
Always carry the $100 parachute
The Basic Parachute costs $100 and weighs 2.5 kg. Buy it every single time, including on kits that have no intention of getting into an aircraft.
You want it for two reasons and only one of them is pilot error. The first is that you have no idea who is flying — a transport is a stranger with a joystick, and jumping out over roughly the right area beats riding a bad approach into the ground. The second is better: an airframe that has been hit does not fall out of the sky instantly, so if you see a missile coming or the pilot commits to somewhere you do not want to be, you leave. A parachute is also just useful terrain equipment. You can step off towers with it.
The Sport Parachute at $1,000 unlocks at Wardog 35 for $25,000 and weighs 9 kg. It is a genuine upgrade and it is not what you need on day one.
If you are the one flying, stock spare chutes in the aircraft's own inventory. Passengers who forgot can pull one out instead of running back to the shop, which is worth more to your transport income than it costs you.
Pack your magazines in the right order
Press C with ammunition in your inventory and the game consolidates it into your magazines. It is a real time-saver and it will also quietly ruin a good kit if you press it at the wrong moment.
The rule is reading order: it fills from the top-left magazine first and works across and down. Loose boxes go into mags in that order, and once the boxes are gone it starts moving rounds between magazines by the same rule — pulling from later mags to top up earlier ones.
That last part is the trap. If you are standing there with two nearly full magazines and one half-empty one, pressing C does not tidy your kit, it shuffles rounds around and can leave you with a part-filled mag where you had a full one. Before you press it, drag the emptiest magazine to the bottom-right of the grid and the fullest to the top-left. Then consolidate.
The $300 IED is your first anti-vehicle weapon
Under the specialist slot, past the launchers you cannot afford yet, sits the Improvised Explosive Device at $300. Its card says the whole story: remotely detonated, and it can only be used once. No unlock level, no unlock cost, no separate trigger.
That last clause is why it beats the obvious alternative. A C4 Charge is $250, but it is inert without the Remote Detonator, which is $550 at the vendor behind a Support 2 gate and a $15,000 unlock. The IED needs nothing. On day one it is the cheapest way to open a gate or kill a vehicle, and the full price list for both is on the equipment catalogue.
Using one is a three-beat process and every beat has a delay in it:
- Plant. Walk up to a vehicle, object or patch of ground until the placement marker turns green, then place. There is a short animation.
- Call it in. Detonation is a right-click that starts a phone call — four or five seconds of animation and ringing before anything happens.
- Wait again. It does not blow on the connection either. There is a further delay after that.
For a laid trap, that means committing well before your target arrives. For a vehicle, the sane pattern is plant, walk away, then detonate. One detail worth having: if you are downed after planting and a teammate revives you, the device is still yours to set off. Being on the floor is not the end of that plan.
Two targets are worth a device on their own. Beta players reported that an IED is the only thing that destroys a Forward Operating Base outright, taking everything stored inside with it — that trade, and what the kill pays, is in how to destroy a FOB. And players report that a device planted directly on a tank's rear engine deck kills the tank in one, which is a much shorter route than shooting through the front of it. Neither has been published by Bulkhead, so both are community findings — but at $300 a device, they are cheap experiments to run yourself.
Ride in a tank you cannot drive
A tank has three seats: driver, gunner in the turret and a commander position on the roof behind a machine gun. The commander is exposed up there, though pressing C drops them down into the ring, which helps against bullets and does nothing at all about explosives or mortars.
Here is the mechanic almost nobody mentions. The main gun's reload speed depends on how many crew are aboard and working. Soloing — driving, then holding zero to hop into the gunner seat yourself — is the slowest configuration by a wide margin. Two crew is the normal rate. A third body in the commander seat is faster again.
In a tank-on-tank fight that is the whole result: a full crew simply gets more shells away than a solo driver, and no amount of aim closes that gap. So take the third person even if all they do is sit there and get revived a lot.
What nobody has is the actual numbers. Bulkhead has not published reload times for any crew count, and the second-by-second figures you will see quoted around this mechanic are illustrations someone invented to explain the ratio, not measurements. The ranking is solid. The seconds are not.
For weak points, the front of the tank is not one. There is a strip of reactive armour low on the glacis — visible from the driver's seat as a sliver along the bottom — and it soaks frontal hits as one shared pool over the hull's health, and it can be repaired. Go around it instead:
- The engine deck at the rear. The real weak spot, and worth manoeuvring for.
- The tracks. Will not kill it, will immobilise it, which against a tank is close enough.
- The fuel tank. Damage here makes the tank burn through fuel faster the worse it gets, which is a slow kill that a crew a long way from a refuel point may not survive.
Shoot wheels and engines, not armour
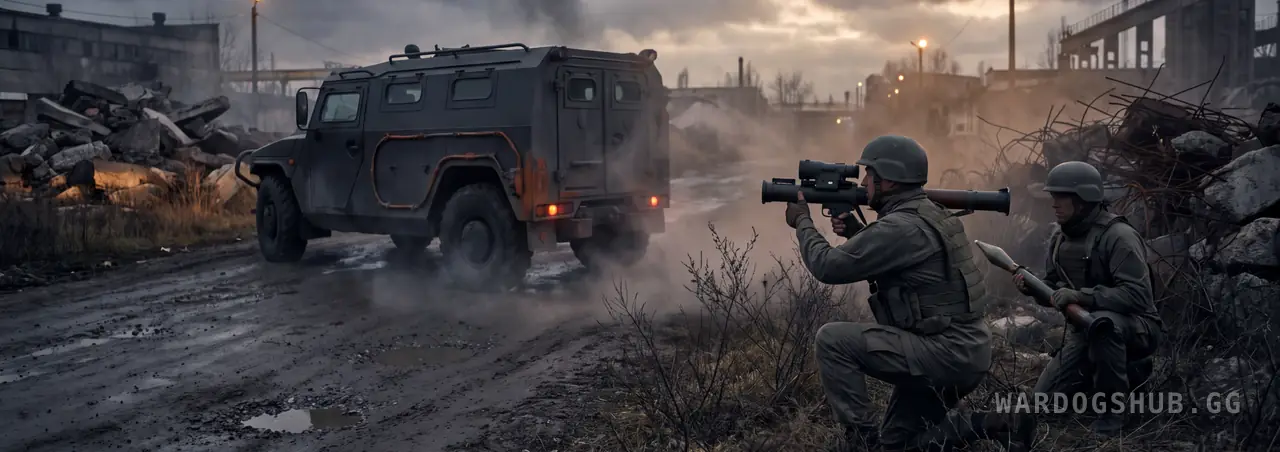
An armoured Humvee with a gun on top is the most dangerous thing most players meet in their first few hours, and small arms will not touch the crew — the glass holds, so you cannot shoot the people inside while they mow you down.
You are not helpless without a launcher. Take the tyres. It will keep driving on the rims, so this is not a kill, but it slows the vehicle down and makes it much harder to steer — crews on rims find trees. Then work on the engine, which is what actually disables it. The same applies to every wheeled vehicle in the game, armoured or not, and the vehicle catalogue has the roster.
Repairs run the other way, and every vehicle has separate repair points: overall hull and engine, each tyre, and the fuel tank. Three tools do the job at three speeds:
| Item | Price | Unlock |
|---|---|---|
| Repair Tool | $150 | none |
| Light Drill | $600 | Support 1, $10,000 |
| Heavy Drill | $1,300 | Support 28, $25,000 |
The drills run on batteries, which is a detail worth knowing before you are stood next to a burning truck watching the charge indicator drain. A Battery is $150, the High Capacity Battery is $300 at Wardog 45, and R swaps a fresh one in. Those same batteries also recharge defibrillators, so a medic and a mechanic are shopping in the same aisle.
Two more things live in this slot. A Fuel Can is $150, refills at any refuel point and works on every vehicle — vehicles carry fuel and will run dry. And if you have flipped a helicopter or wedged a truck, hold F on the reposition prompt and the game will shove it clear of whatever it is stuck on. It does not always work. It works often enough to try before you walk.
Buy into the vehicle, not into your pockets
At base, a vehicle offers a buy prompt on B, and most players find the first tab and stop.
That first screen is the vehicle's own consumables: ammunition for its mounted weapons, and countermeasures on the airframes and armour that have them. You can also buy a crate here, which rides in the bed and can be filled with ammunition or supplies, and G kicks it out onto the ground where you want it.
The part people miss is the Items tab, which opens the entire store from inside the vehicle. You can buy drills, fuel cans, magazines and everything else straight into the vehicle's inventory rather than buying them, carrying them over and loading them by hand. A Fuel Can that eats four slots on your body takes one in the vehicle. Load the truck before you leave the base and the truck becomes your resupply.
Press re-buy
You will die. When you get back to the shop, do not click your way through twenty items again: there is a re-buy button that reassembles your entire last kit, and then a confirm to pay for it.
It is not quite one press and it is close enough. The trick worth knowing is that you can adjust before you confirm — hit re-buy, change what you want with the arrows on the item list, then confirm and buy. One rough edge: quantities step one at a time, so a kit that included 200 build supplies means 200 presses to strip them out. For a cheap kit it is the fastest route back into a match by a wide margin, and it is the real reason to always have a parachute on the loadout. Die, re-buy, and the helicopter waiting on the pad is not a problem.
What nobody has published yet
Four gaps, stated plainly, because the pages telling you otherwise are guessing:
- The exact HP and AP multipliers, and how each type interacts with a plate's reduction. The table at the top of this guide is a set of practice-range readings from the beta, not the underlying rule, and armour also wears down as it takes hits — so a shot on a fresh plate and a shot on a battered one are not the same shot.
- Tank reload times in seconds for one, two and three crew. The mechanic is real. Every number attached to it in circulation is illustrative.
- What HP and AP cost. Both types carry their own prices and neither is public.
- Whether the APC radar trick holds in the Early Access build, and whether the FOB is really a one-IED kill.
If you settle one of those with something repeatable, send it over — corrections go up with a date on them, and how we work explains what we will and will not print. In the meantime: load FMJ, buy the $100 chute, and take the third seat in the tank.